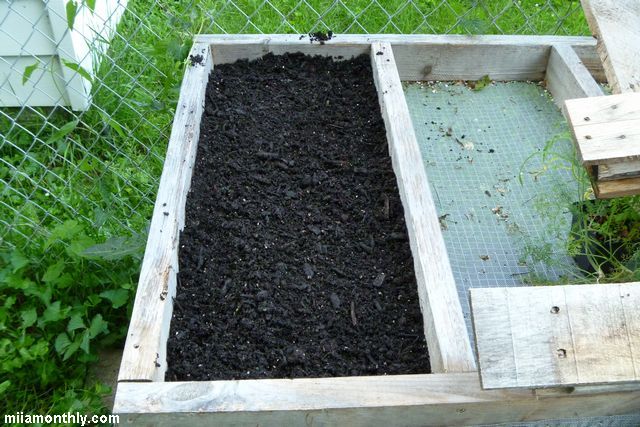
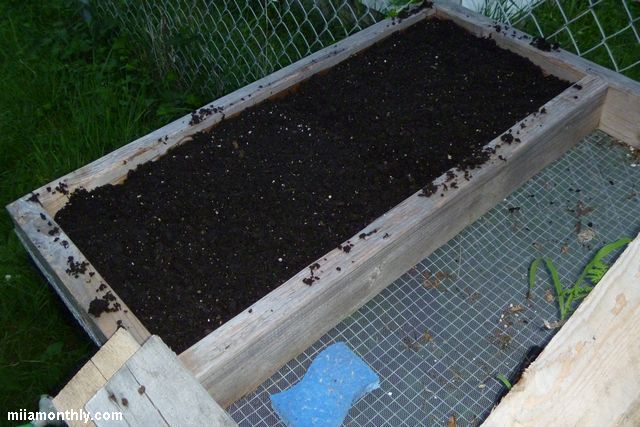
Once again I have another planting project that should have been started at least two months ago but wasn’t and that was the salad table.
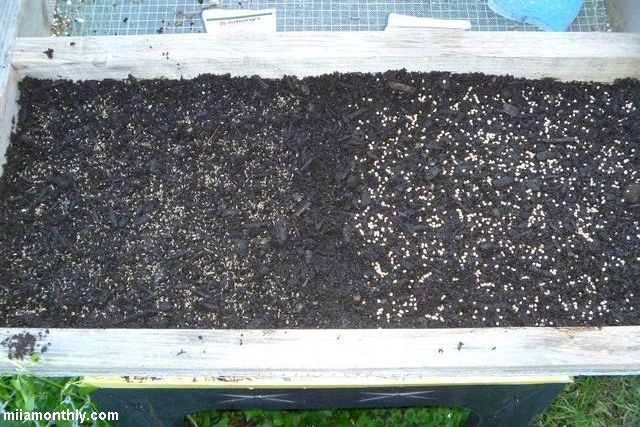
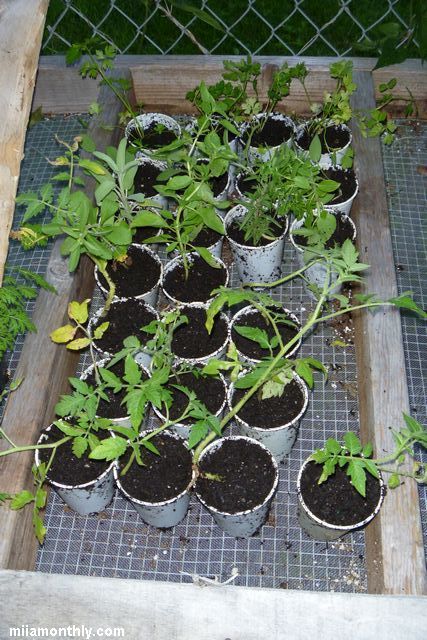
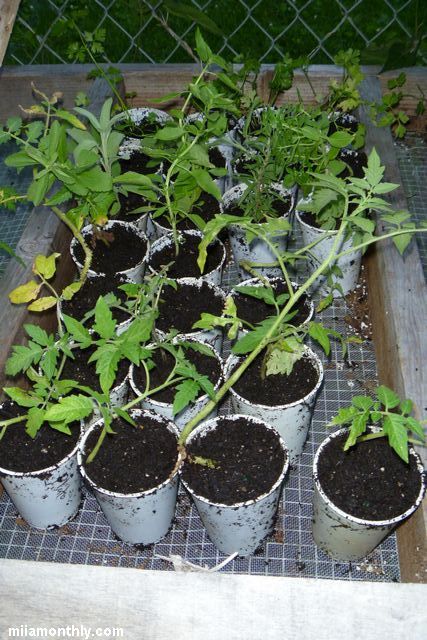
This is one of those things that only takes 15-20 minutes to plant, but I just kept on putting it off. You’ll notice that in some of the other salad table cells, are the remaining seedlings. The plan is when I visit my sister for 4th of July weekend, that I’ll give her all the remaining seedlings. Even though transplanting them in July, is way late in the season. But who knows, maybe something will turn out from this experiment.
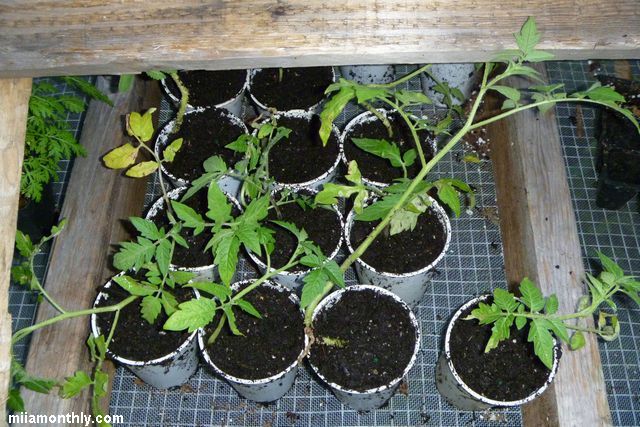
And speaking of late season transplants, you’ll notice that I’ve transplants all the remaining seedlings from their 9-cell packs into 10 oz plastic cups. This way the plants will be a little bit less root bound, come transplant time on the 4th of July.
With winter weather basically upon us, its time to start getting into soup & stew mode. So while cooking for a wedding rehearsal dinner last year with JRR & Nook, one of the items that we made was a cream of carrot soup recipe that I found in an old issue of Food & Wine magazine. At first glance the recipe appears to be super easy to make (with only 8 main ingredients), and it also appears that it would be a good base recipe for any kind of cream of vegetable soup, such as broccoli or cauliflower soup. So lets dig in. Continue reading →
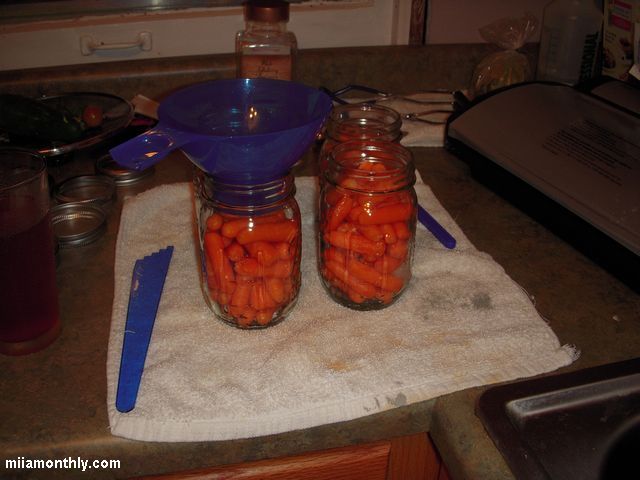
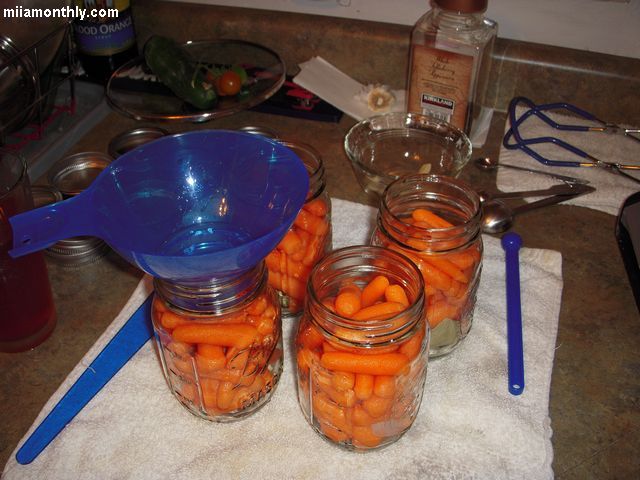
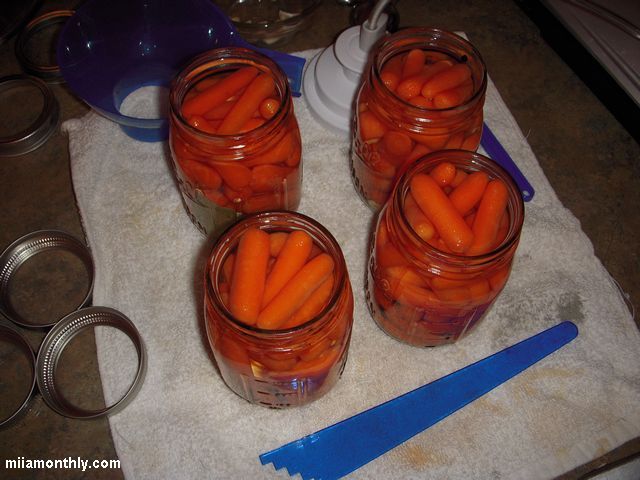
So onto one of the first canning experiment, making a batch of pickled carrots. My original idea was to use the bag of carrots that I had in the fridge to make a carrot soup recipe that I saw in Food & Wine magazine. But as usual, one thing led to another, and the carrots that were meant for soup ended up being pickled.
Here are the two base recipes (Number 1 & Number 2) that I used as a starting point. But I ended up taking more of a cue from recipe #2, since it was an adapted recipe from Gourmet Magazine:
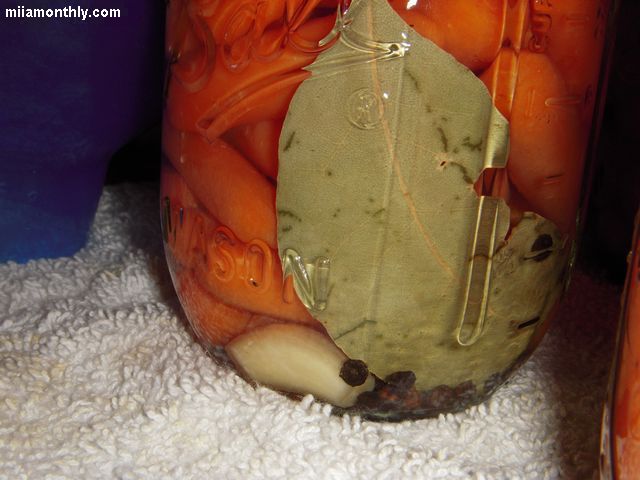
2 lbs baby carrots (Dole carrots in a bag)
Brine:
2 1/2 cups water
2 cup plain vinegar
1/2 cup white sugar
3 TB canning salt
Per pint jar:
1 whole clove of garlic
1 dried bay leaf
1/2 tsp whole black peppercorns
Yield 4 pints
In a pot of salted water, I cooked the baby carrots for 5 mins so that they were halfway cooked. The carrots were then cooled down in an ice water bath, to stop the cooking process. While the carrots were cooking and then cooling down, in another pot bring all the brine ingredients to a boil, then keep the mixture simmering for at least 15 minutes. At the same time that you are heating up the brine, pre-heat four pint sized canning jars in large pot of hot water. Once the brine is done cooking, remove the pint jars from the pot and drain. Then place the spice mix at the bottom of each jar, placing the par-cooked carrots on top of the spice mix. Finally fill the jars with the hot brine to within a 1/4″ of the top of the jar, remove all the air bubbles using your preferred method (mine is using the Food Saver jar attachment), cap, and then process in a boiling water canner for 15 minutes. After the jar are done processing, place them on a tea towel in a draft-free location to let the vacuum seal form, and to allow the jars to cool down. After 24 hours, any jars that haven’t seal need to be refrigerated, and the others that did seal can be put away to “age” before consuming.
Side Notes:
1) Since I only canned these carrots this past weekend (so 5-6 days ago.) I’m going to wait another week or two before giving them a taste test. That way the vinegar will have some time to mellow and spices will get a little more time to work their flavor magic.
2) Strangely enough, the amount of liquid listed above is enough to fill up all four pint jars with no waste.
3) For some reason online, their are a lot of recipes for pickled carrots with dill. And the idea of pairing dill and pickled carrots just wasn’t doing it for me. So I pretty much went off into my own direction, with a lot of guidance from the Gourmet recipe for a starting point.
4) Most of the pickled carrot recipes I read online, were all over the board is far as sugar in the brine (1/2 cup to 2 cups.) which to me seemed like way too much. So I went with the Gourmet recommendation of 1/4 cup per pound of carrots.
Cooked carrots cooling in the sink
The Food Saver, ready to suck the air bubbles from full jars
I’ve posted a couple of close up shots of the compost/potato bins, so that you can get a good look at the coat hanger wires that are used to hold all the pallets together. Boy do those grass clipping need a good turning in the bin, but its kind of surprising that I’m still able to add grass clippings to the pile. Since with last years cinder block compost bin, in only two mowing I had filled the bin to the top. Plus now that I’m looking it over, I might pull some of the clippings out of the bin, and lay them down as ground mulch out in the garden, since the weed situation on the right half of the garden is still out of control. I ended up pulled up two 5 gallon buckets of weeds from the garden one afternoon and it barely looks like I made a dent. Continue reading →
Editors Note:This should have been posted months ago. Sorry for the delay, but this should hopefully answer a bunch of questions about the pallet set-up from other pics posted on miia.
When I was in Michigan a few months back for a little bit of R & R. In the backyard of my buddy’s house, he had converted a bunch of old pallets into three side-by-side composting bins. So after a few beers and some meat smoking, it got me to thinking about the large pile of pallets just sitting at the end of driveway that I never bothered to dispose of (it was more like I felt bad throwing away good wood, so that’s why the pallets were really piled up.) In that instead of using the pallets for a compost bin, that maybe I could grow potatoes in them instead. Continue reading →
Talk about quick turnaround time. When I got home from work last night, I had a little cardboard box in my mailbox from Johnny’s. So now I’ve got to lay out my seed starting calendar for the next couple of months. The plan so far is to start all the herbs and pepper seeds (jalapeno, aji limo, bell, etc) this week, and then some time next week I’ll start the seeds for all the tomatoes. And then in about two weeks, I’ll start the cucumbers & zucchini inside as well as sowing some of the seeds that need direct sowing (carrots, beets, lettuce, corn, peas, beans, etc.)
When I reviewed all the seeds that I ordered, I noticed an interesting trend with a large portion of the seeds that I ordered. In that maybe two thirds of the seeds that I ordered, are seeds that need to be directly sow into the ground. So really the only seed starting that I’ll need to do this year are for the herbs, peppers, tomatoes, zucchini and cucumbers.
One little tool that I picked up this year, are two seedling heater mats. We’ll see if they are any help in germinating my seeds, since I keep my house right around 63F, so any extra heat to get the seeds off to a strong start is a bonus in my book.