So onto canning recipe number two and the spicy pickled beans. My original thinking about making the spicy pickled beans, was as a garnish for my occasional bloody mary’s. Plus this is another way for me to clear out all the bean plants, so that I can get the plot ready for a second planting of beans in a few weeks. Continue reading
Tag: water
Pickled Carrots – v1 – July 2010
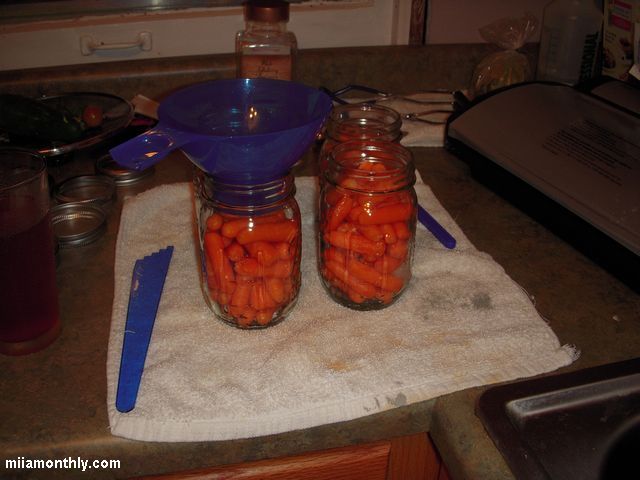
So onto one of the first canning experiment, making a batch of pickled carrots. My original idea was to use the bag of carrots that I had in the fridge to make a carrot soup recipe that I saw in Food & Wine magazine. But as usual, one thing led to another, and the carrots that were meant for soup ended up being pickled.
Here are the two base recipes (Number 1 & Number 2) that I used as a starting point. But I ended up taking more of a cue from recipe #2, since it was an adapted recipe from Gourmet Magazine:
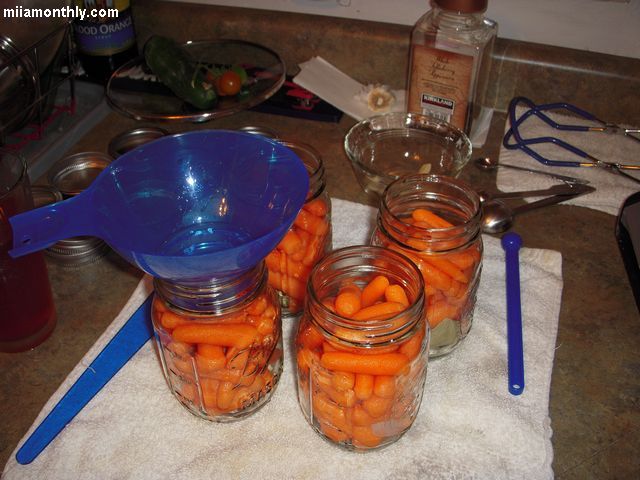
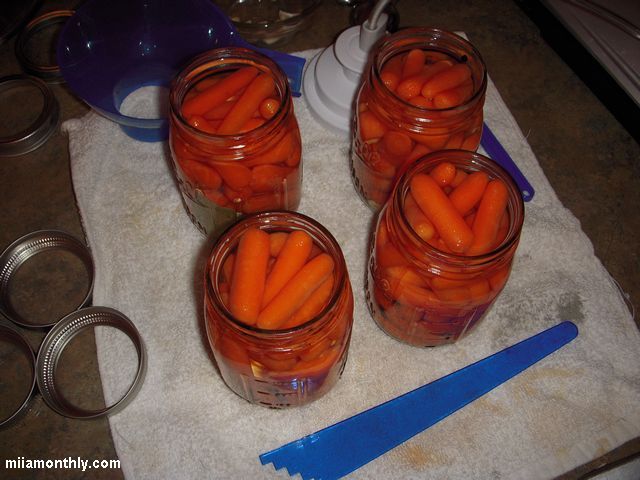
- 2 lbs baby carrots (Dole carrots in a bag)
Brine:
- 2 1/2 cups water
- 2 cup plain vinegar
- 1/2 cup white sugar
- 3 TB canning salt
Per pint jar:
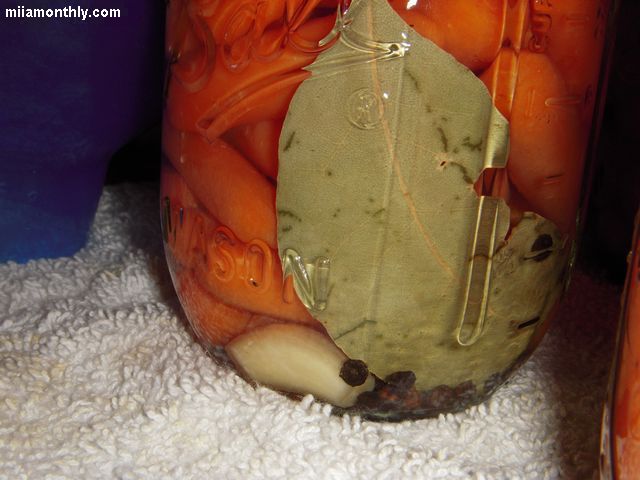
- 1 whole clove of garlic
- 1 dried bay leaf
- 1/2 tsp whole black peppercorns
Yield 4 pints
In a pot of salted water, I cooked the baby carrots for 5 mins so that they were halfway cooked. The carrots were then cooled down in an ice water bath, to stop the cooking process. While the carrots were cooking and then cooling down, in another pot bring all the brine ingredients to a boil, then keep the mixture simmering for at least 15 minutes. At the same time that you are heating up the brine, pre-heat four pint sized canning jars in large pot of hot water. Once the brine is done cooking, remove the pint jars from the pot and drain. Then place the spice mix at the bottom of each jar, placing the par-cooked carrots on top of the spice mix. Finally fill the jars with the hot brine to within a 1/4″ of the top of the jar, remove all the air bubbles using your preferred method (mine is using the Food Saver jar attachment), cap, and then process in a boiling water canner for 15 minutes. After the jar are done processing, place them on a tea towel in a draft-free location to let the vacuum seal form, and to allow the jars to cool down. After 24 hours, any jars that haven’t seal need to be refrigerated, and the others that did seal can be put away to “age” before consuming.
Side Notes:
1) Since I only canned these carrots this past weekend (so 5-6 days ago.) I’m going to wait another week or two before giving them a taste test. That way the vinegar will have some time to mellow and spices will get a little more time to work their flavor magic.
2) Strangely enough, the amount of liquid listed above is enough to fill up all four pint jars with no waste.
3) For some reason online, their are a lot of recipes for pickled carrots with dill. And the idea of pairing dill and pickled carrots just wasn’t doing it for me. So I pretty much went off into my own direction, with a lot of guidance from the Gourmet recipe for a starting point.
4) Most of the pickled carrot recipes I read online, were all over the board is far as sugar in the brine (1/2 cup to 2 cups.) which to me seemed like way too much. So I went with the Gourmet recommendation of 1/4 cup per pound of carrots.


Pita Bread Recipe – v2 & v3
After making pita bread with the original recipe, I noticed that the pitas would get very tough, almost leather like once the pita’s had cooled from baking. So I started flipping through this old bread baking book that I own for some problem solving help. And in the bread books recipe for pita bread it mentioned that if your pitas are very tough after baking, that it usually means that the bread has too much gluten. They recommended that the easiest way to correct the issue is that instead of using all high gluten/bread flour, to go with a 50/50 mix of bread flour and all purpose flour. So for version 2 of the recipe, I went with the 50/50 mix and kept anything else the same. Well this batch of 50/50 pitas still turned out tough. So after that little experiment failed (as well as the books advise being total BS), I was pretty much out of idea’s on why my pita’s were coming out tough.
About a couple of months ago, I was doing some cooking for my sisters Halloween dinner party, and one of the dishes that I had to make were pizza shells for “candy corn pizza wedges” (don’t ask.) I used my normal pizza dough recipe, but the flour I used was a super high gluten flour from Cargill that my sister had on hand. Since the wedges were going to be baked a second time so that the cheese could melt to make the wedges look like candy corn. Instead of fully baking the dough, I just blind baked the pizza shells for 3 minutes instead of the usual 5 minutes.
Well that ended up being the key, as to why my pita’s were turning out tough. But the more that I thought about it the more it made sense. Since with a longer baking time, it will make the bread drier (think about how soft under baked bread can be.) So with a 5 min bake time, I was baking more of a pita cracker (or pita chip) instead of a soft pita bread. So for v3, the only change was reducing the baking time from 5 minutes to 3 minutes on the original recipe.
One other change for v3 is that after I rolled out the pitas, I gave it a little extra time (5 to 10 minutes) of relaxing/rising time before popping the pita in the oven. One other thing that I still need to work, but that I’ve mentioned in the past, is not to roll out the pita too thin and basically working all the air pockets out of the dough. But both of these are just minor techniques that I need to keep working on with future batches of dough.
Side Note: I’m not posting any pics with this post, since the pitas pretty much look the same on the outside as the pitas in the original recipe.
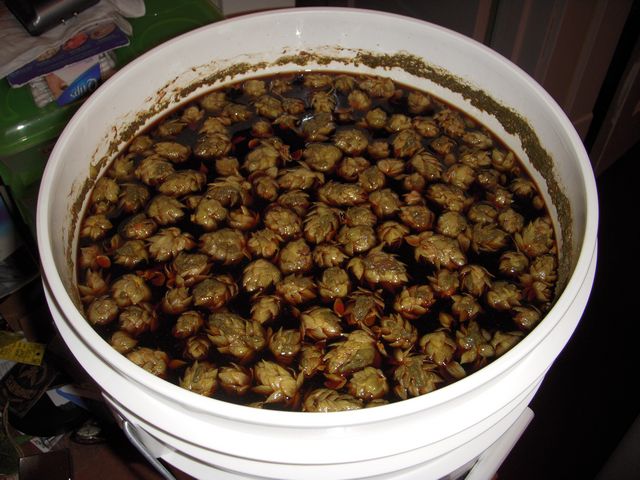
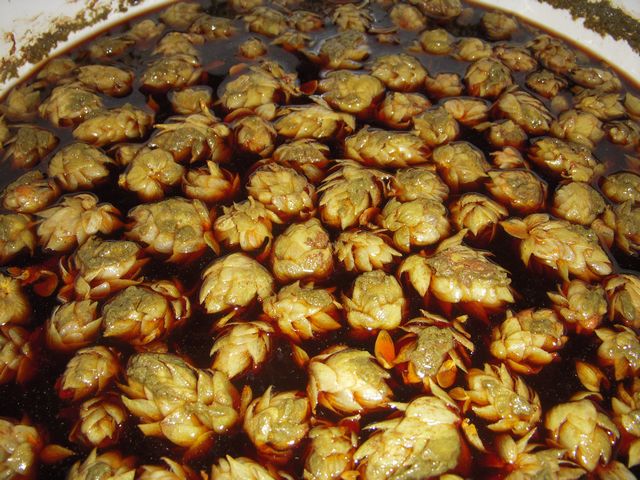
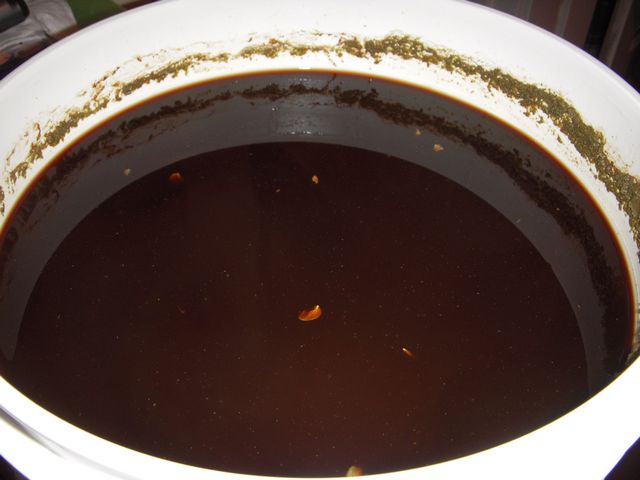
Canning Aji Limo or Aji Limon Peppers
Oh mother were these some hot peppers. When I got a bag of these aji limo peppers from my farmer neighbor. I tried one in the yard, and they packed some heat, which at the time I thought was around the same level as a jalapeno (they are actually about 3 to 10 times hotter then jalapenos.) So after 24 hours in a brine solution, they turned down right radioactive. Continue reading
Canning Tomatoes – Fall 2009
I like tomatoes, but there is no way that I can eat all the fresh tomatoes that I have, so it’s time to test out some more of my canning skills.
I put off canning the tomatoes from the garden for a while now. Since I had a very tough time finding citric acid. But after a little bit of searching on the net, I found out that a lot of homebrew websites carry citric acid. I swung by my local homebrew shop and sure enough they had 1 lb bags of citric acid in stock. So I was back in business. Continue reading
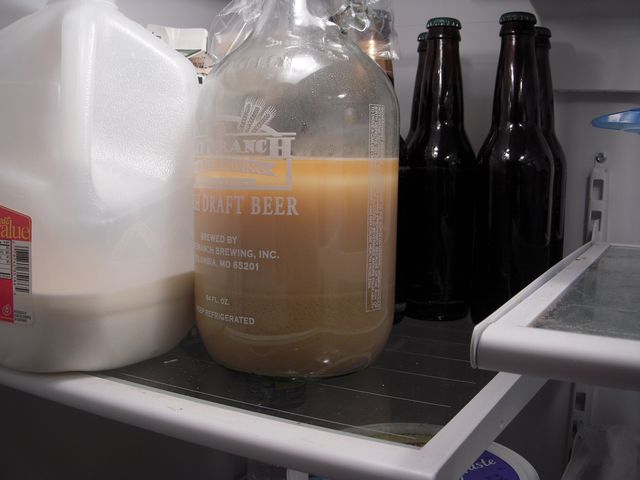
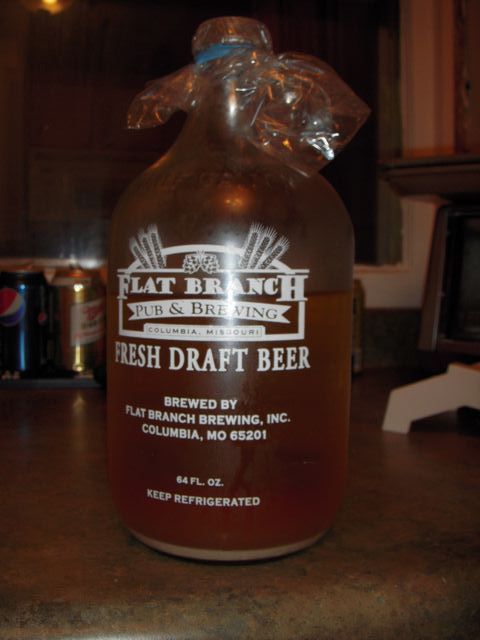
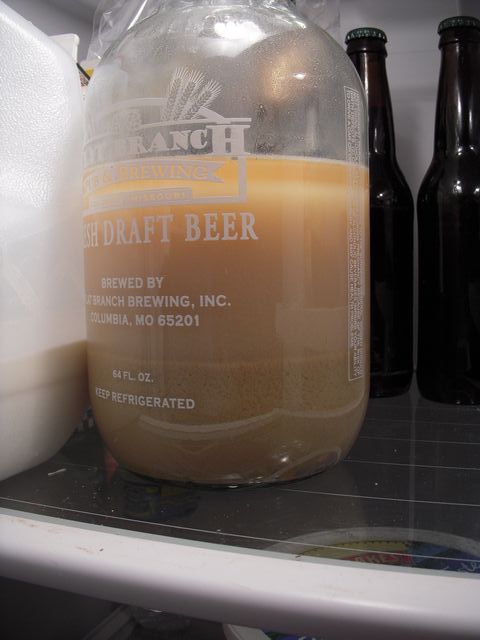
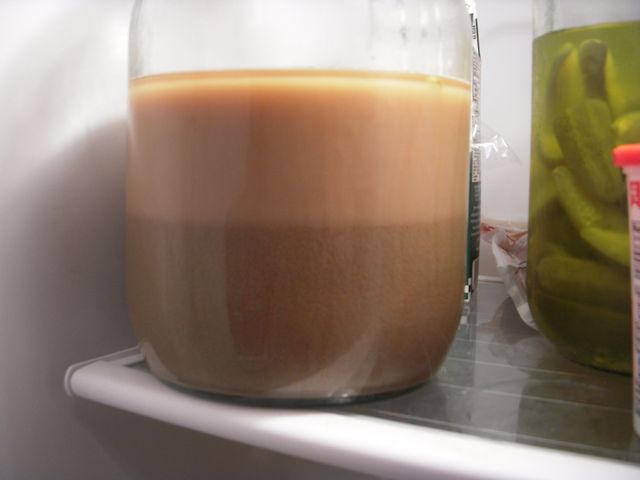
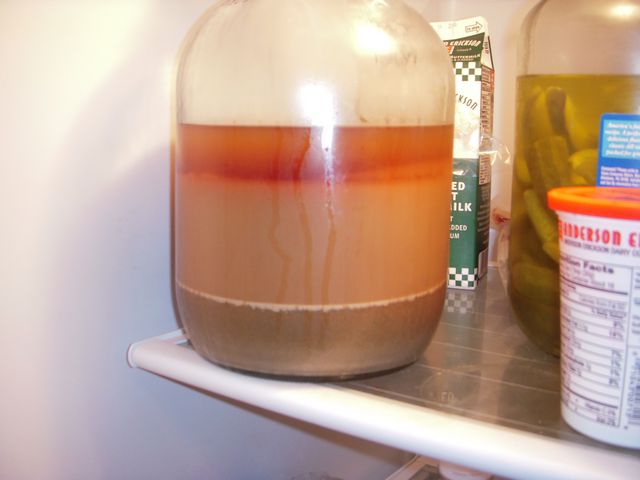
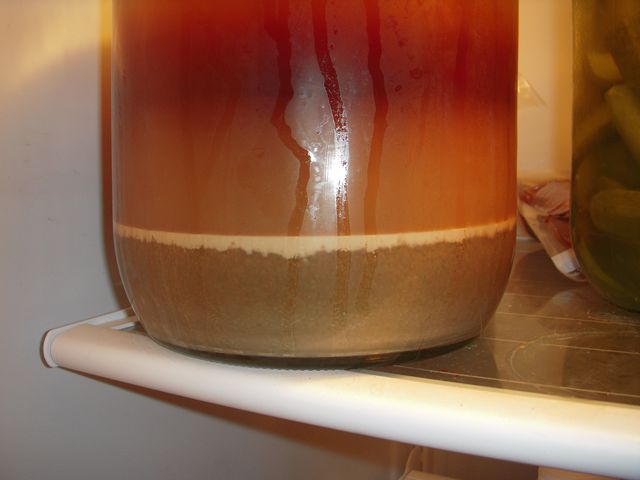
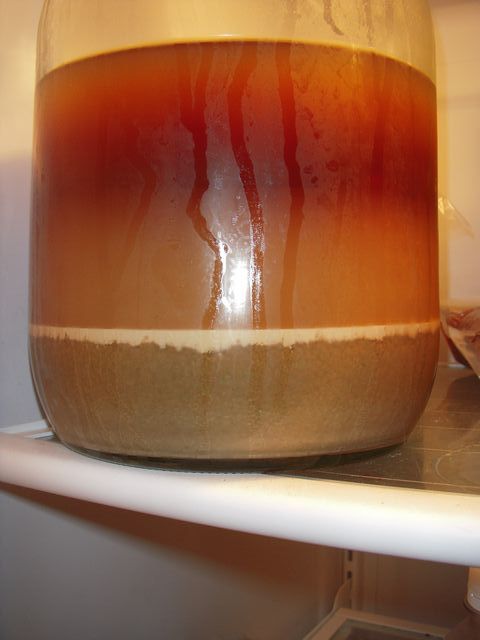
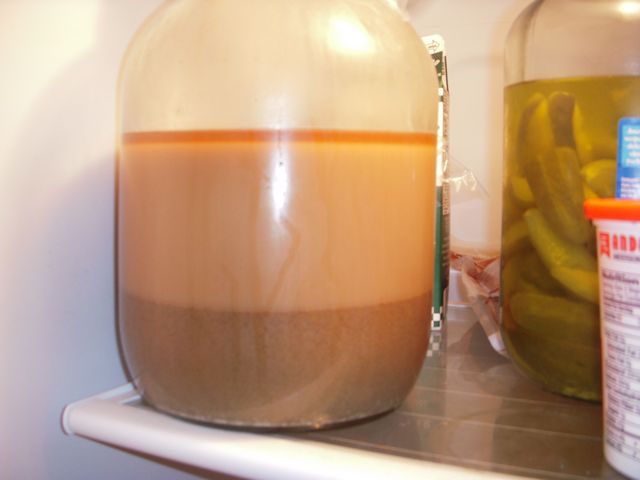
Yeast separating the dry stout
One tip on separating yeast in the fridge, don’t let it sit in the fridge overnight. Since the yeast in suspension will eventually settle on top of the trub. It may look pretty cool in the growler, to see all the gradations of trub and yeast. But all it does is forces you to start from scratch, putting everything back in suspension. The lesson I learned is don’t rack beer at 1:00 am, since more then likely you won’t be up at 4:00 am to separate out the yeast in suspension from the trub.


Making Pita Bread
I’ve got a whole container full of hummus, and I’m out of pita bread and pita chips. So its time to try and make pita bread again. In the past, I’ve basically used a dough recipe that was just for “pita bread”, they of course turned out nothing like pita bread, but more like a pita puck. Continue reading
Yeast starter for weekend brew session
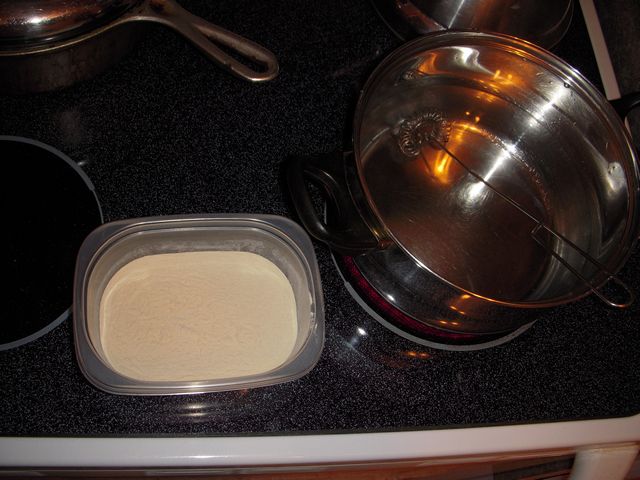
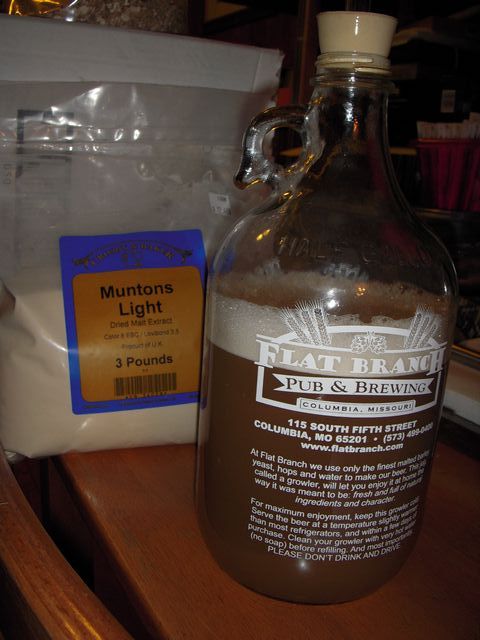
It looks like the centennial hops have reached there peak, so it’s time for a brew session on Saturday. After quickly hashing out an IPA recipe with JRR (recipe and brew session to be posted later.) I made a quick trip to my favorite local homebrew shop to get all the grains for the brew and some light DME for the yeast starter.
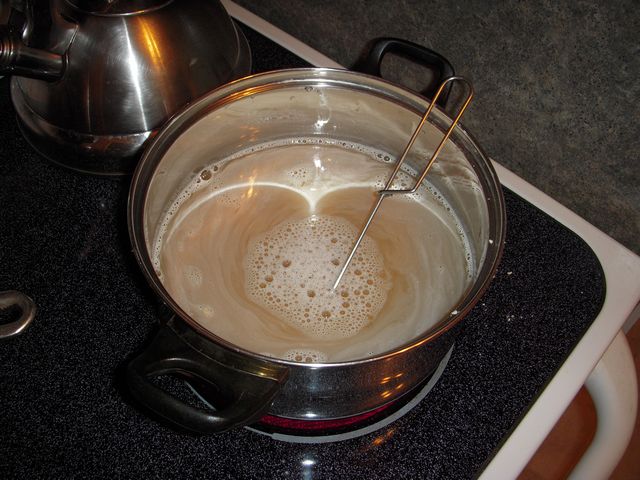
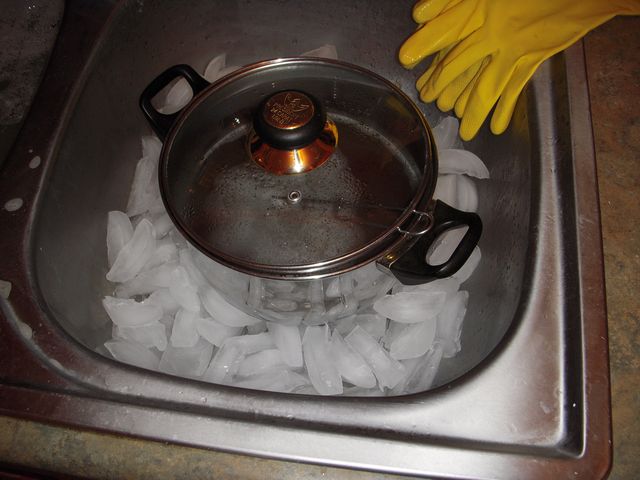
My mixing ratio for the yeast starter was 2 oz (by weight) light DME to 16 fluid oz of water. I put the mix on the stove and brought it to a boil, letting it boil for 15 mins. I then cleared out my ice maker of all the old ice, dumping it in the kitchen sink. Putting the pot on the ice pile to cool it all down to room temperature. Keep in mind that the separated yeast that I am using has been sitting in a growler in the back of my fridge since St. Patty’s this year. So hopefully this starter will get the yeast alive and kicking again.
As kind of a side note, it’s amazing how cheap a brew session can get when you don’t have to get hops or yeast. All the grains for this weekends 5.5 gallon brew session ran $17.23 (not including tax.) That’s nuts, when you consider that it costs ~$18 for 4 oz of dried hops and a vile of White Labs yeast. No wonder a lot of guy/gals are now starting to grow their own hops and reusing yeast. The money saving is just undeniable.