Dill Pickles – v1 – 07/14/2010

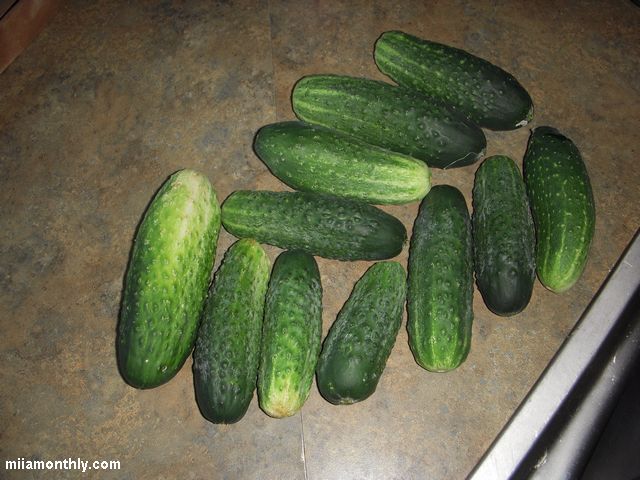
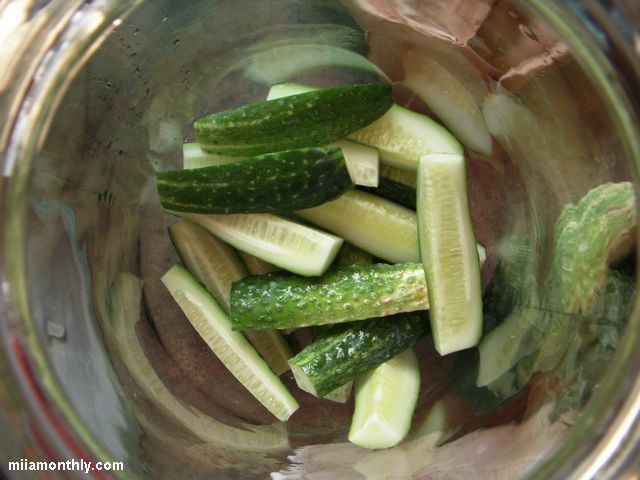
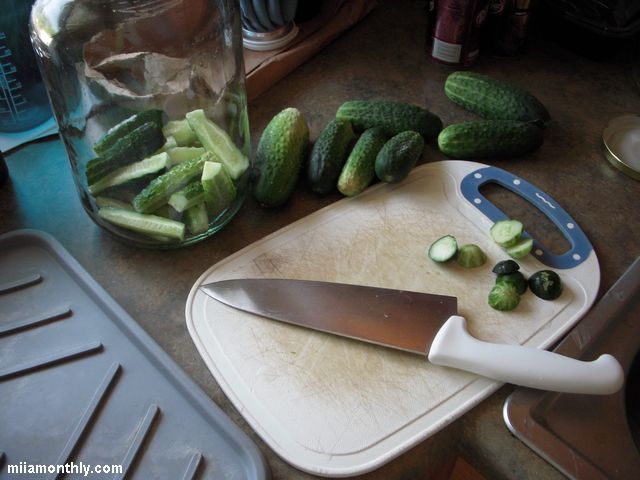
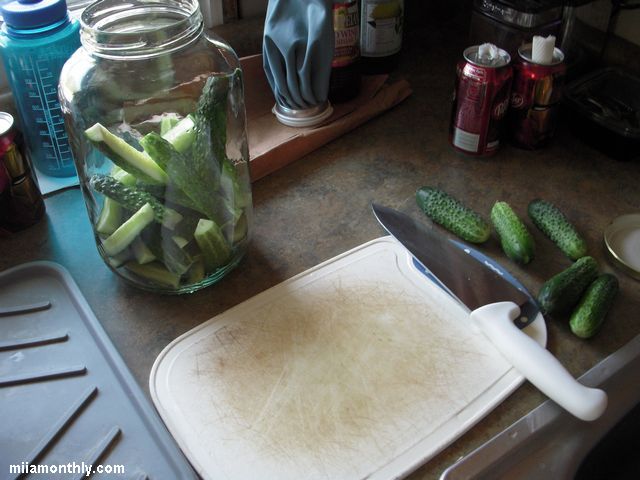
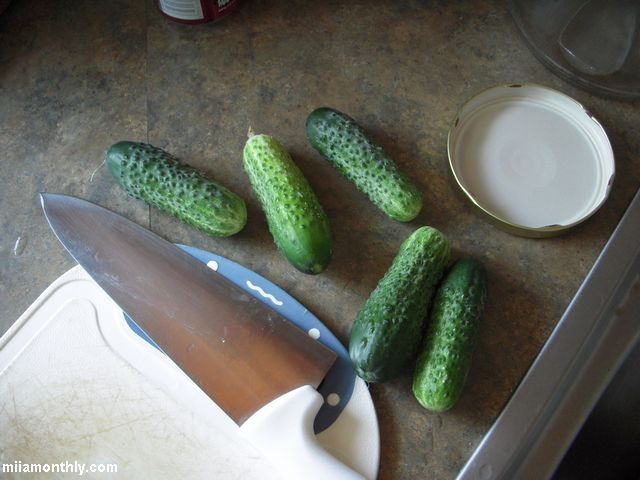
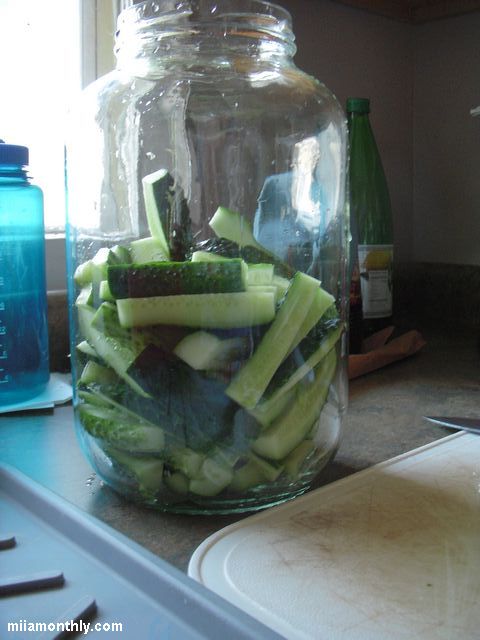
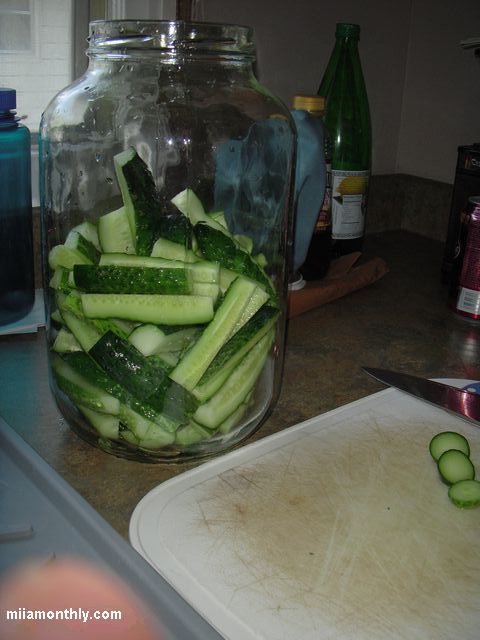
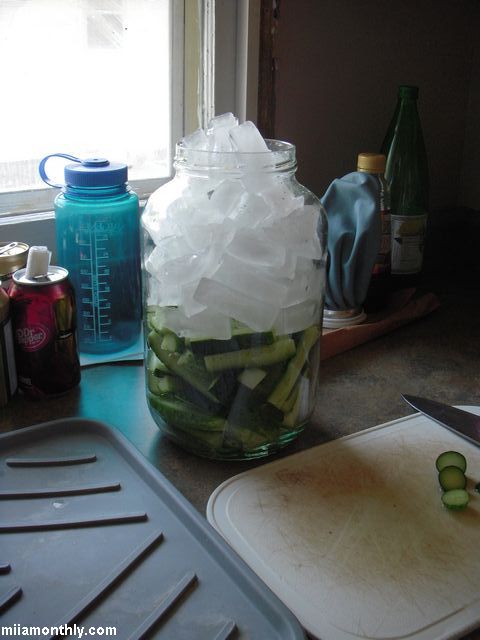
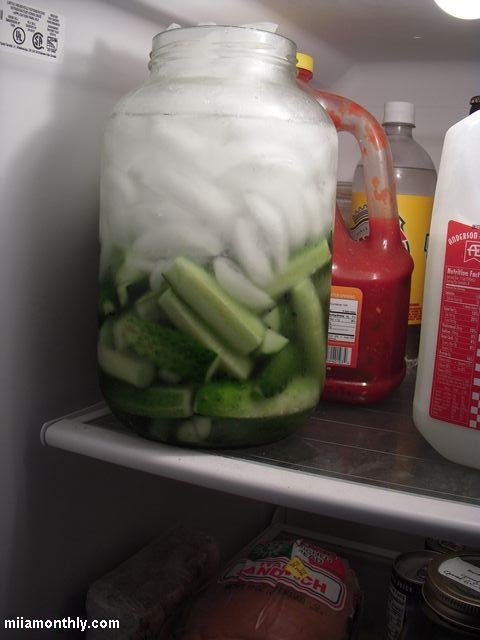
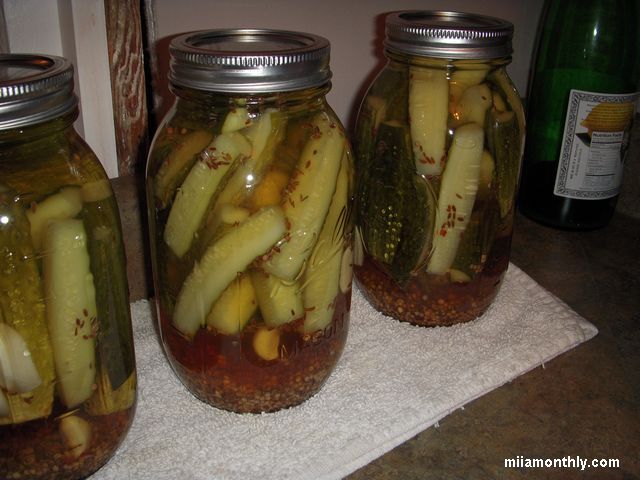
And now for the final canning recipe, even though I made these a couple of days before the carrots and beans. I kind of went in a totally different route, in that I didn’t soak the pickle spears in a brine before canning. Since I’ve noticed that all the brine pre-soak does, is make your final product extra salty. So somewhere online, I saw a bunch of tips on soaking the sliced cucumbers in an ice-bath to increase the final pickles “crispness”. But seeing how I only soaked them for an hour before processing, I really don’t know if it added much to the recipe, since most recipes were suggesting a 4 to 5 hour ice bath before processing.

So on to rest of the recipe:
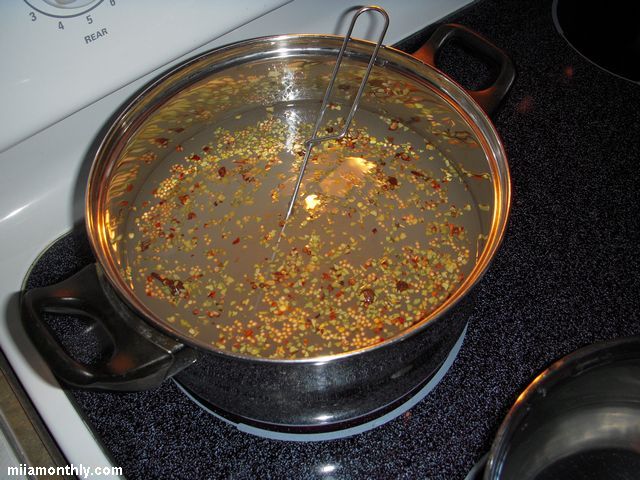
Brine

  • 1 qt (4 cups) vinegar
  • 1 qt (4 cups) water
  • 2 TB pickling mix
  • 1/4 cup white sugar
  • 1/2 cup canning salt

Bring Mixture to a boil, then simmer for 15 mins.
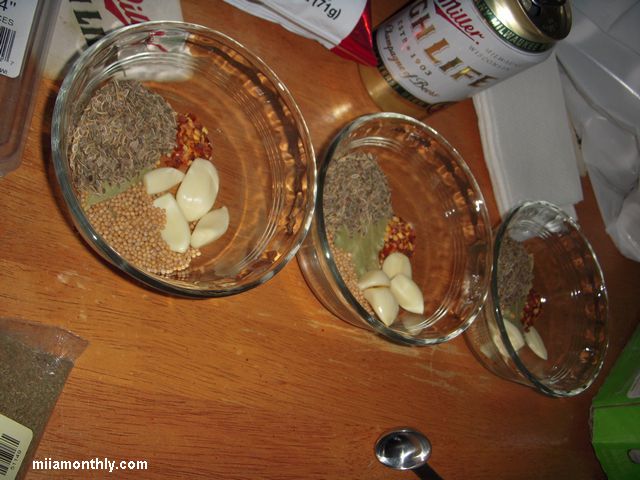
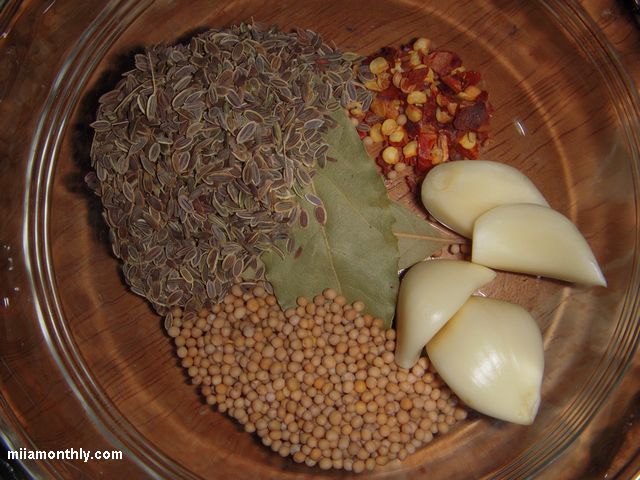
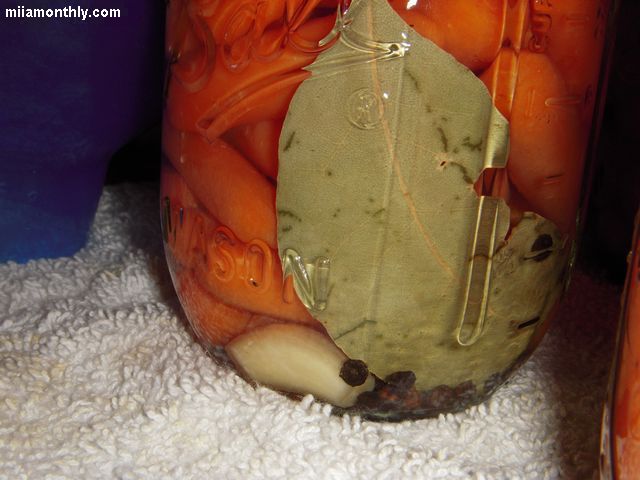
Per quart jar add:

  • 2 bay leaves
  • 4 cloves garlic
  • 1/4 tsp red pepper flakes
  • 2 tsp mustard seed
  • 3 tsp Dill seed

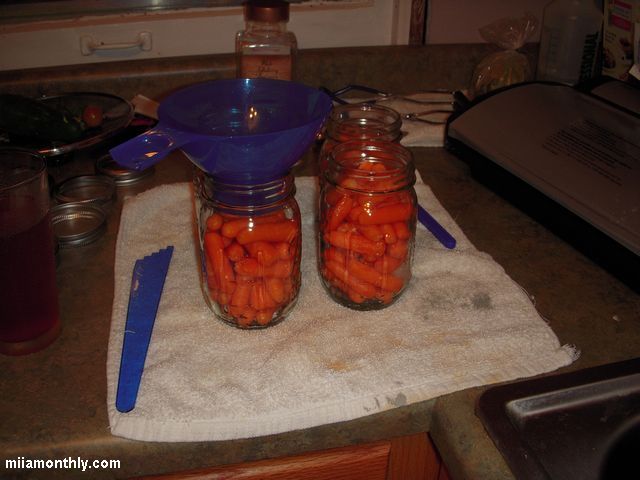
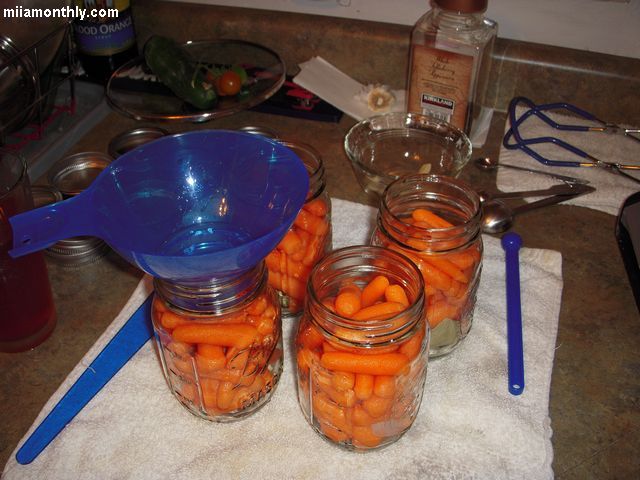
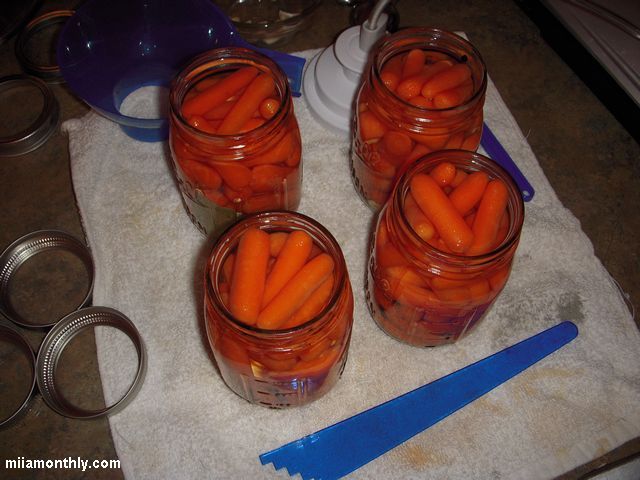
Remember to make sure and use to plastic knife to get out the air bubbles. I also use the mason jar attachment for the food saver to get all the bubbles out.
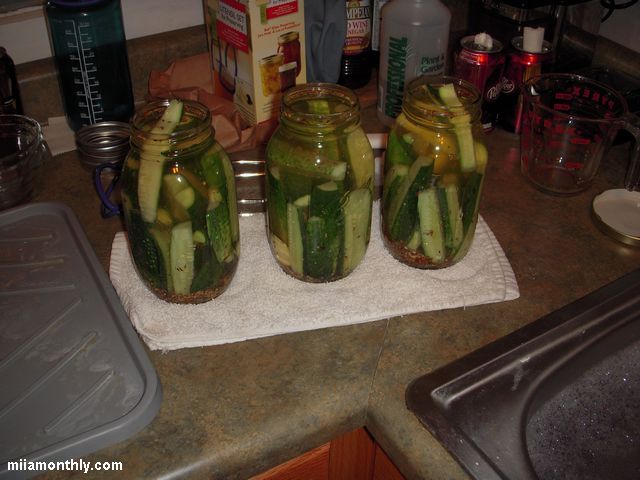
Yield: 3 quart jars
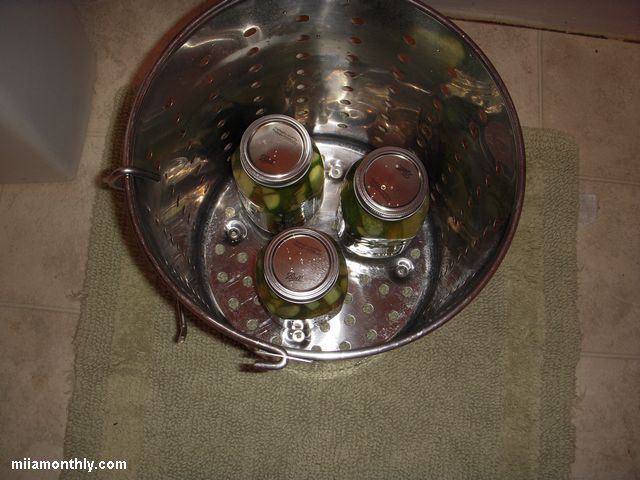
Process 15 mins in a boiling water canner

Side Notes:
1) Since these pickles were the first canning experiment of the year, I forgot a bunch of steps that I would normally do. The big one being to get the air bubbles out the jar before processing. I was lucky that all the jars sealed after processing. But I guess this is what I get for the first canning session of the year.
2) The brine amount in the recipe ended up being the prefect amount for three quart jars, with no waste.
3) Since I forgot to grow fresh dill this year to add to the pickles, I went with dill seed instead.

Pickled Spicy Beans – v1 – July 2010

So onto canning recipe number two and the spicy pickled beans. My original thinking about making the spicy pickled beans, was as a garnish for my occasional bloody mary’s. Plus this is another way for me to clear out all the bean plants, so that I can get the plot ready for a second planting of beans in a few weeks. Continue reading

Pickled Carrots – v1 – July 2010

So onto one of the first canning experiment, making a batch of pickled carrots. My original idea was to use the bag of carrots that I had in the fridge to make a carrot soup recipe that I saw in Food & Wine magazine. But as usual, one thing led to another, and the carrots that were meant for soup ended up being pickled.

Here are the two base recipes (Number 1 & Number 2) that I used as a starting point. But I ended up taking more of a cue from recipe #2, since it was an adapted recipe from Gourmet Magazine:

  • 2 lbs baby carrots (Dole carrots in a bag)

Brine:

  • 2 1/2 cups water
  • 2 cup plain vinegar
  • 1/2 cup white sugar
  • 3 TB canning salt

Per pint jar:

  • 1 whole clove of garlic
  • 1 dried bay leaf
  • 1/2 tsp whole black peppercorns

Yield 4 pints

In a pot of salted water, I cooked the baby carrots for 5 mins so that they were halfway cooked. The carrots were then cooled down in an ice water bath, to stop the cooking process. While the carrots were cooking and then cooling down, in another pot bring all the brine ingredients to a boil, then keep the mixture simmering for at least 15 minutes.  At the same time that you are heating up the brine, pre-heat four pint sized canning jars in large pot of hot water. Once the brine is done cooking, remove the pint jars from the pot and drain. Then place the spice mix at the bottom of each jar, placing the par-cooked carrots on top of the spice mix. Finally fill the jars with the hot brine to within a 1/4″ of the top of the jar, remove all the air bubbles using your preferred method (mine is using the Food Saver jar attachment),  cap, and then process in a boiling water canner for 15 minutes. After the jar are done processing, place them on a tea towel in a draft-free location to let the vacuum seal form, and to allow the jars to cool down. After 24 hours, any jars that haven’t seal need to be refrigerated, and the others that did seal can be put away to “age” before consuming.

Side Notes:
1) Since I only canned these carrots this past weekend (so 5-6 days ago.) I’m going to wait another week or two before giving them a taste test. That way the vinegar will have some time to mellow and spices will get a little more time to work their flavor magic.
2) Strangely enough, the amount of liquid listed above is enough to fill up all four pint jars with no waste.
3) For some reason online, their are a lot of recipes for pickled carrots with dill. And the idea of pairing dill and pickled carrots just wasn’t doing it for me. So I pretty much went off into my own direction, with a lot of guidance from the Gourmet recipe for a starting point.
4) Most of the pickled carrot recipes I read online, were all over the board is far as sugar in the brine (1/2 cup to 2 cups.) which to me seemed like way too much. So I went with the Gourmet recommendation of 1/4 cup per pound of carrots.

Let the random canning begin for 2010

For some reason this year, I’m going to need to do a lot of canning/freezing, since the garden is putting out way more food then I can eat each day. And this bounty already includes plenty of stuff that I’ve already given away to friends and co-workers. Just to give you an idea of the bounty this year, on July 14th I picked sixteen cucumbers from the garden that went into the 3 quart jars of pickles. When I went into the garden today the 18th to check the sweet corn for wind damage (because of the heavy storm we had last night) I ended up picking 8 cucumbers from the garden without really looking hard.

So last week I started the first of many canning sessions that will happen this year, and the first experiments of the year was 3 quart jars of dill pickles, 4 pint jars of spicy pickled beans (both green & wax from the garden) and 4 pint jars of pickled carrots (I ended up using baby carrots from the store, since the potatoes over took the carrots in the pallet bin.)

I’ll add separate posts over the next couple of days for the recipes for the dill pickles, pickled carrots, and spicy pickled beans. Just to keep the length of this post manageable, compared to the sausagefest post which ran close to three pages just in text.

Sauerkraut is done!

After a little bit over two months, I’m pulling the plug on the fermentation phase of this sauerkraut and moving on to the consumption phase of this batch. There was only a couple of things that I did to the sauerkraut before placing it into the fridge.
1) Cleaned and sanitized a 1 gallon glass jar (it was from a batch of pickles I bought last year at Sam’s Club.)
2) I squeezed all the brine out of the sauerkraut, leaving the brine in the fermentation bucket.
3) With the remaining brine in the fermentation bucket. I racked the brine to a stock pot and brought it to a rolling boiling, and kept it boiling for 15 minutes before cooling it down to room temperature in an ice bath.
4) Once the brine was cooled, I poured it back over the sauerkraut in the jar, just until the sauerkraut was covered in brine.

Now its time for me to start making some Reuben sandwiches at home, so I can consume all this sauerkraut. Good thing I didn’t buy more cabbage before St. Patrick’s day when it was $0.09 a lb, to start a second batch of sauerkraut. Since then I really would have had sauerkraut up the wazoo!

Sauerkraut – v1 – 10 days later

Its been a little over a week, and the cabbage is finally starting to slowly look and taste like sauerkraut, though it still has quite a bit of the cabbage crunch. Another couple of weeks fermenting, and we should be in sauerkraut city.

Side Note:

  • When my mom mentioned if I had collected a large stone to place on top of the cabbage in the fermentor, I really didn’t understand what she was getting at. Well a week later I now understand the point she was making. The glass salad plate that I had used to submerge the cabbage in the brine was woefully insufficient. After about three days, all the gas that the cabbage was generating caused quite a bit of volume expansion in the fermentor to the point that I would have to squeeze down on the cabbage daily to degas it. Next time around I’m going to wrap a 15lb or 20 lb weight lifting plate in plastic in order to keep the sauerkraut submerged.

Turning cabbage into sauerkraut – v1

This is one of those strange projects that I’ve wanted to try for a very long time. Somehow an email chain was started in my clique, about one of them being on a cabbage fix lately. Since that chain email planted the cabbage seed in my head. When I ended up going to the grocery store this past weekend, they just happen to have cabbage for $0.33 a lb. Three heads of cabbage and 10 lbs later I was off and running with this sauerkraut experiment. Continue reading

Drying Sage in the Box Fan dehydrator

Since I’ve basically mulched the garden and cleared everything out, I had to do something with the sage plant that was still alive and kicking, even after the killing frost in October. So I basically stripped all the good leaves from the plant and laid the leaves on a screen for the dehydrator to do its thing.

I did end up using a blue furnace filter this time around. I set the fan on medium speed instead of low, but it still took about 7 days to dry a single frames worth of sage leaves. Personally I thought that it would have been a little bit quicker, but go figure.

Canning a batch of Pickled Jalapenos – v2 – Oct 2009

After I made the first batch of jalapeno rings, I started to think that I might want to try and make the jalapeno rings a totally different way. In case I run into any issues with the first batch (such as the rings being too salty). Don’t ask me how, but somehow I ended up on the website for  Backwoods Home Magazine, and they had an article about canning peaches. Well within that page they had a link to “The USDA Complete Guide to Home Canning” on the Penn State University web site. Continue reading

Drying Basil in the Box Fan Dehydrator

Now that I have the box fan dehydrator built, its time to dry something. And I just got a bucket full of basil from my farmer neighbor, at first I thought about making it into pesto and freezing it into ice cube trays. But why not put the box fan through its maiden voyage, to work out any kinks.

Well it turns out that the type of filter you use can be a major kink in using a box fan dehydrator. The filter that I started with was a cotton style filter with a MERV 8 rating. The problem with using a filter with that high of a rating was that the box fan wasn’t strong enough to blow its air capacity through the filter. So a majority of the air ended up bouncing off the filter back though the box fan. So what was supposed to take a day to dry out ended up taking five days. So for next time I’m going to use one of those blue furnace filters that has a MERV 2 rating, since a MERV 8 is just overkill in this application. That is unless you are a dust freak/germ-a-phobe, then maybe a MERV 8 is the way to go.